
Soda Cracker
Also known as a saltine, a soda cracker is a crisp savoury cracker made with baking soda. Soda crackers are typically square and have a grid of small perforations. These small holes prevent the crackers from over-puffing during the baking process. Soda crackers can come in boxes containing stacks of individual crackers wrapped in plastic, or in small individual serving packs that include two sets of still-connected crackers that you break apart.
We will use the soda cracker form to explore how to set up a file that has cuts within other cuts and to explore the pathfinder tool.
Ingredients
• 1/8” baltic birch plywood measuring approximately 10 x 10”
Tools
• 100 grit sand paper, a sanding sponge or a nail file


Files
Directions
1. Download and open a soda_cracker file.
Measure the material you are working with and adjust the artboard of the file to match.
You’ll see that in this file, the small interior perforations of the cracker appear in a .01pt red and the outline of the cracker shape appears in blue. These different colours indicate that the interior shapes (red) will be cut before the exterior shapes (blue). As a general rule, any time there are nested cuts, you want to ensure that these cuts are ordered from the inside out. We do this because if the blue outline were cut first, the entire cracker shape would drop out from the material its being cut from and could cause it to move out of place.

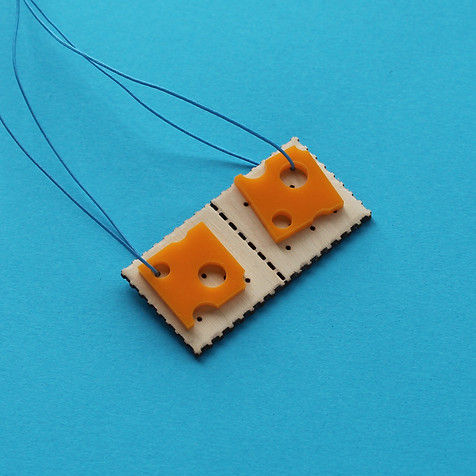
2. Using the artwork provided for the cracker, you will create a pair of joined crackers. To do this make a copy of the cracker by either selecting the entire shape and using the copy and paste commands or by selecting the entire shape and dragging it over as you hold down the "option" (mac) or "alt" (pc) key down.

3. You want to place the copied cracker so that it overlaps slightly with the original shape.
Once aligned, use the Combine tool in the Pathfinder menu to turn these two shapes into a single form. If you do not see the Pathfinder menu on your screen, go into the Window drop-down menu at the top and select the Pathfinder tool palette from the list of available tools.

4. Once joined, you want to change the colour of the perforations down the middle into RGB RED to indicate that you want these cuts to happen before the cracker outline.

5. Cut or send your file to be cut. You can find a list of some online laser cutting service centres here.

6. Once cut, you want to sand the top surface of the cookie to remove any soot or burn marks. You also want to lightly round the top edges of your cookie. You can use a finer file to emphasize the ridges around the edges.


Exploring Scale and Function


